To help you track, optimize, and run profitable campaigns, we need access to your Meta Business Manager. This access lets us set up your Meta Pixel and Conversions API (CAPI) correctly, so we can connect your website to your Meta account for better tracking, reporting, and sales performance.
This is a one-time setup that ensures everything is properly linked.
Why It Matters:
Without the pixel and CAPI set up properly, you’ll miss valuable data from your website.
It helps you track visitors, purchases, and other key events from your ads.
It improves your ad targeting and helps reduce wasted ad spend.
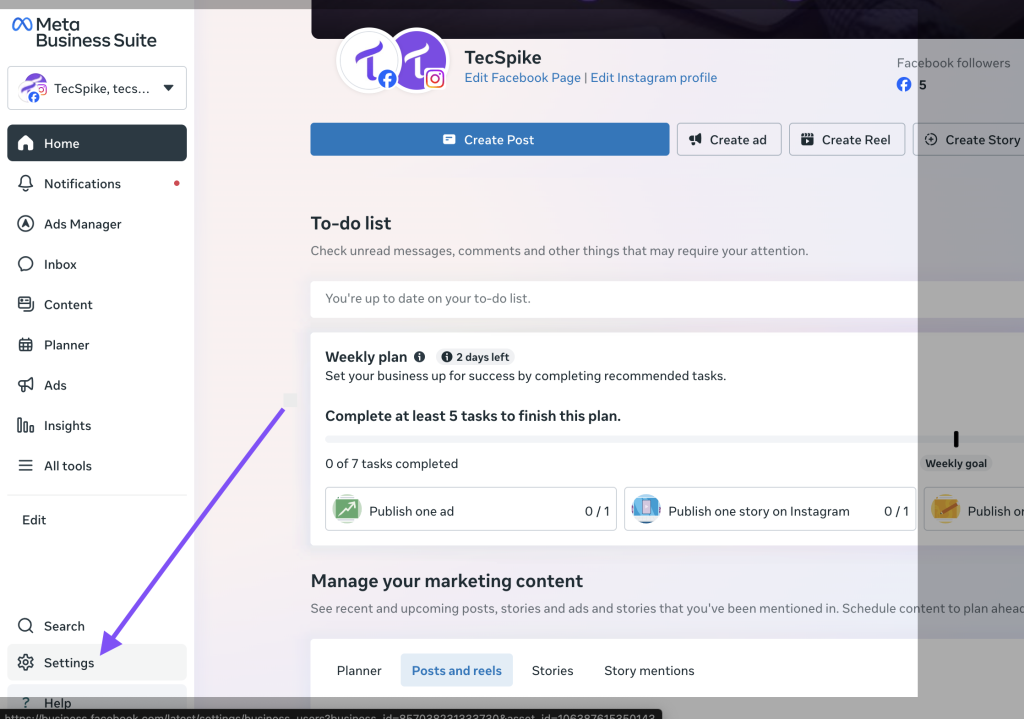
You should get to the interface in the image below
Then Locate and click on ‘Settings’
STEP 2:
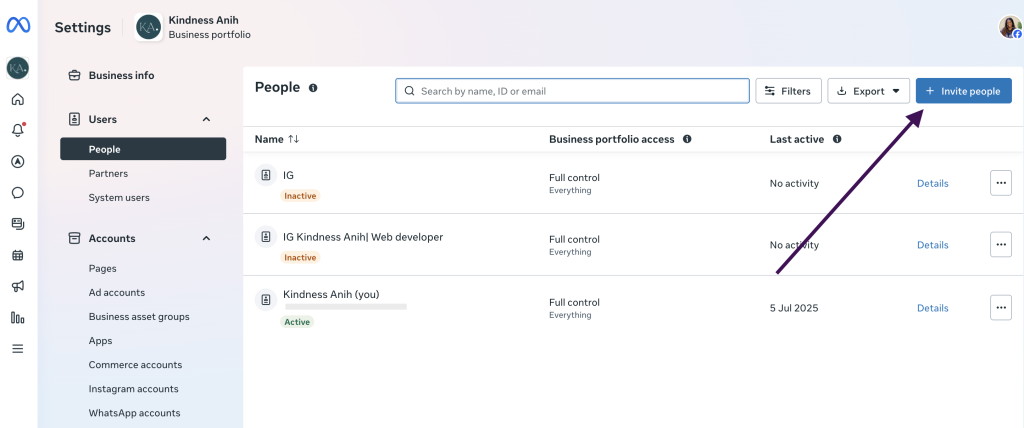
When you click on Settings (as shown in the image above), you’ll be taken to a new page.
On the left menu, find and click ‘Users’, then choose ‘People’ from the dropdown.
Next, click the ‘Invite People’ button to invite Tecspike to your business manager account
STEP 3:
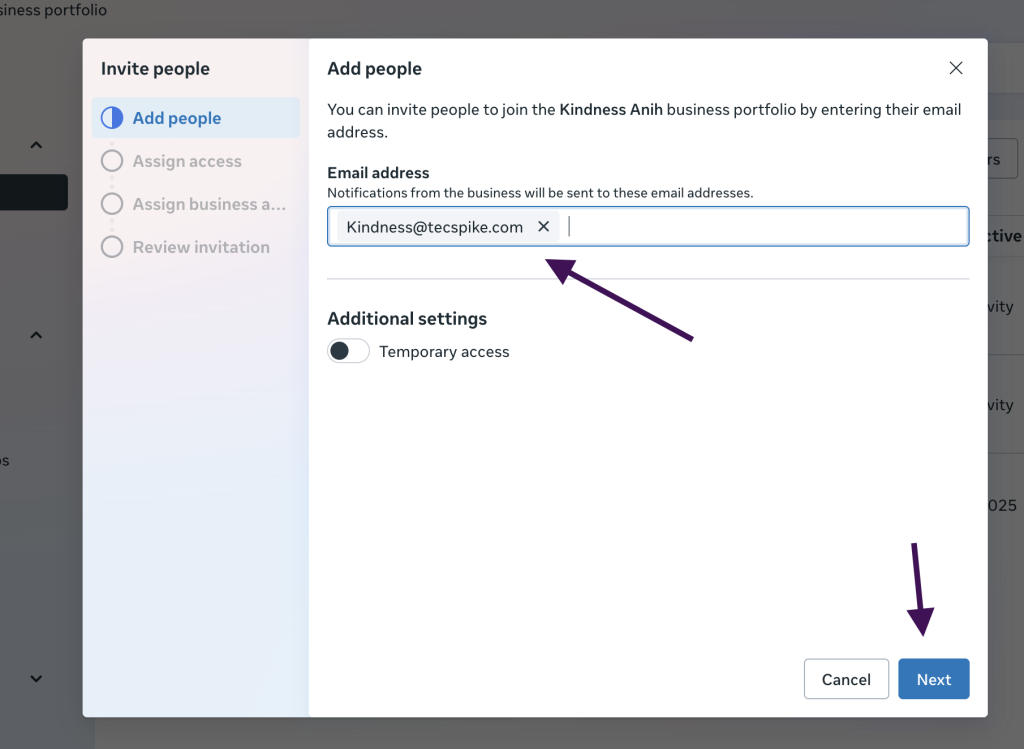
When you click on the button, add the email: ” kindness@tecspike.com ” and click on next.
STEP 4:
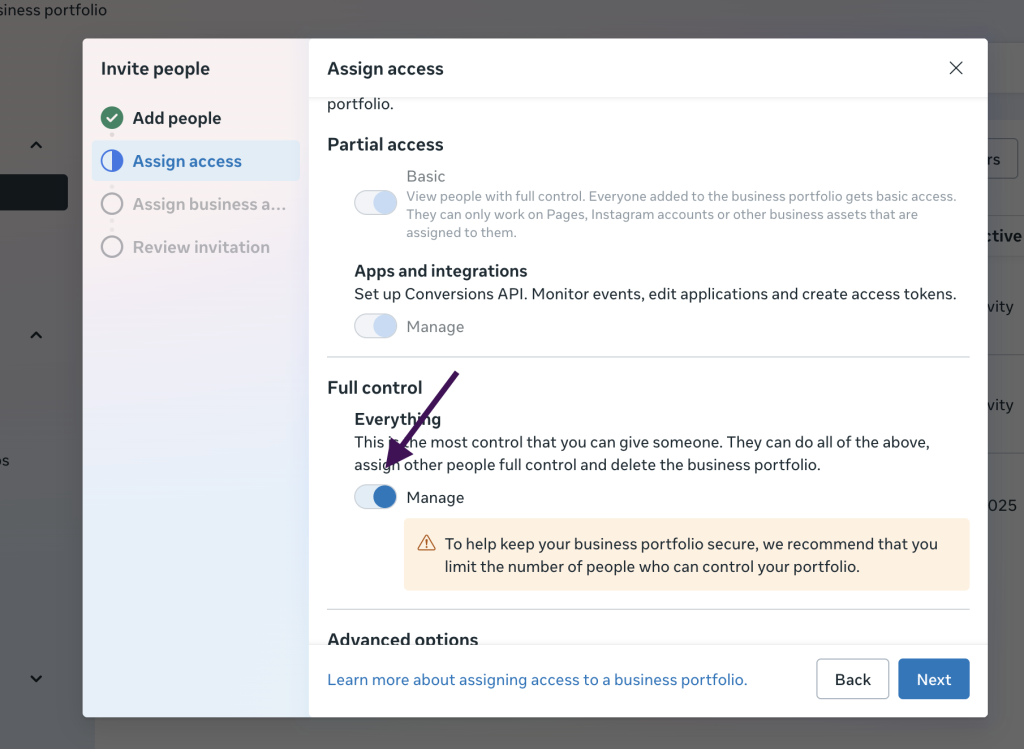
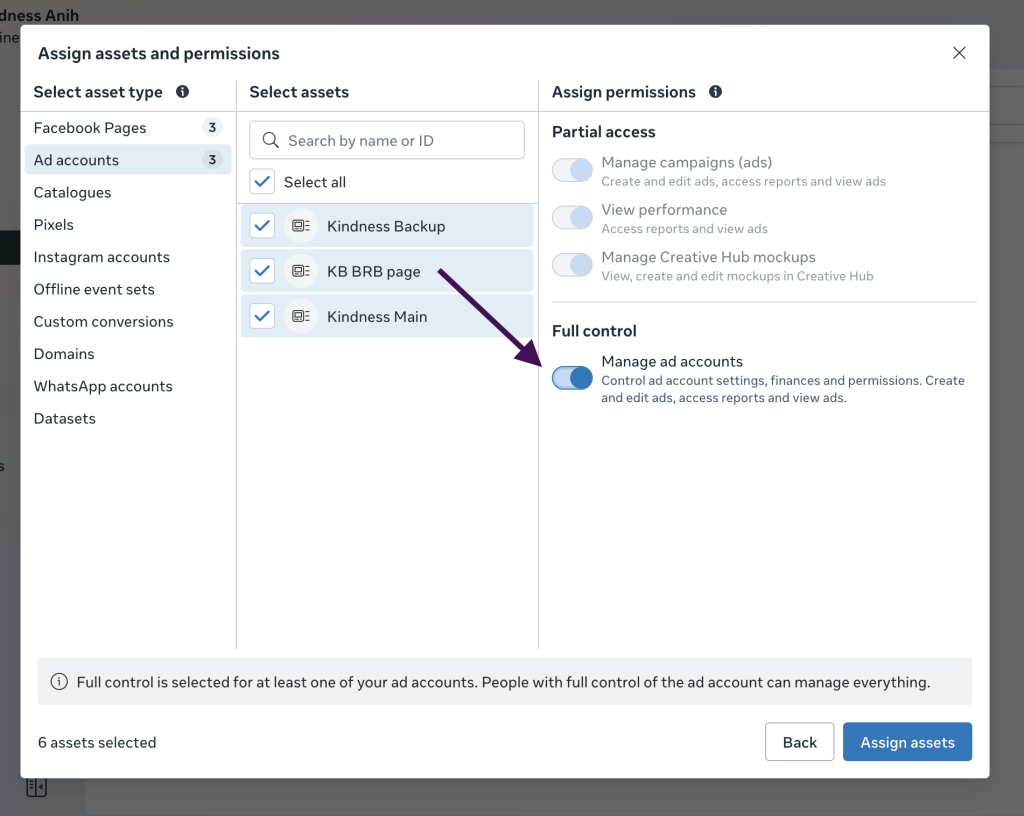
Give us the right access so we can set up your Pixel and Dataset properly. We recommend selecting “Full Control” when assigning access, this allows us to be able to create and complete the setup without restrictions.
Once everything is done, you can remove us from your business account
STEP 5:
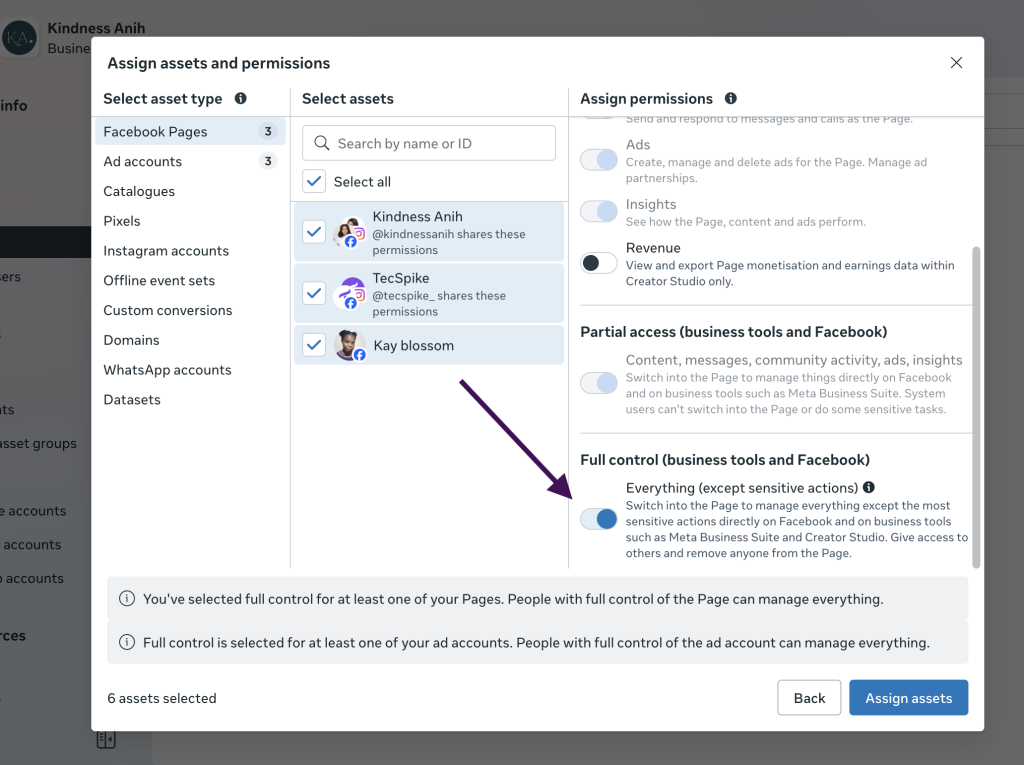
Go to the Facebook Pages tab, select all the pages you want the Pixel connected to, and choose Full Control. Next, go to the Ad Accounts tab, select the ad account(s) you’d like the Pixel connected to, and choose Full Control.
Then go to the Instagram Accounts tab and do the same.
If you already have an existing Pixel you’d like us to use, go to the Pixels tab and assign it to us as well. If not, we’ll create a new one.
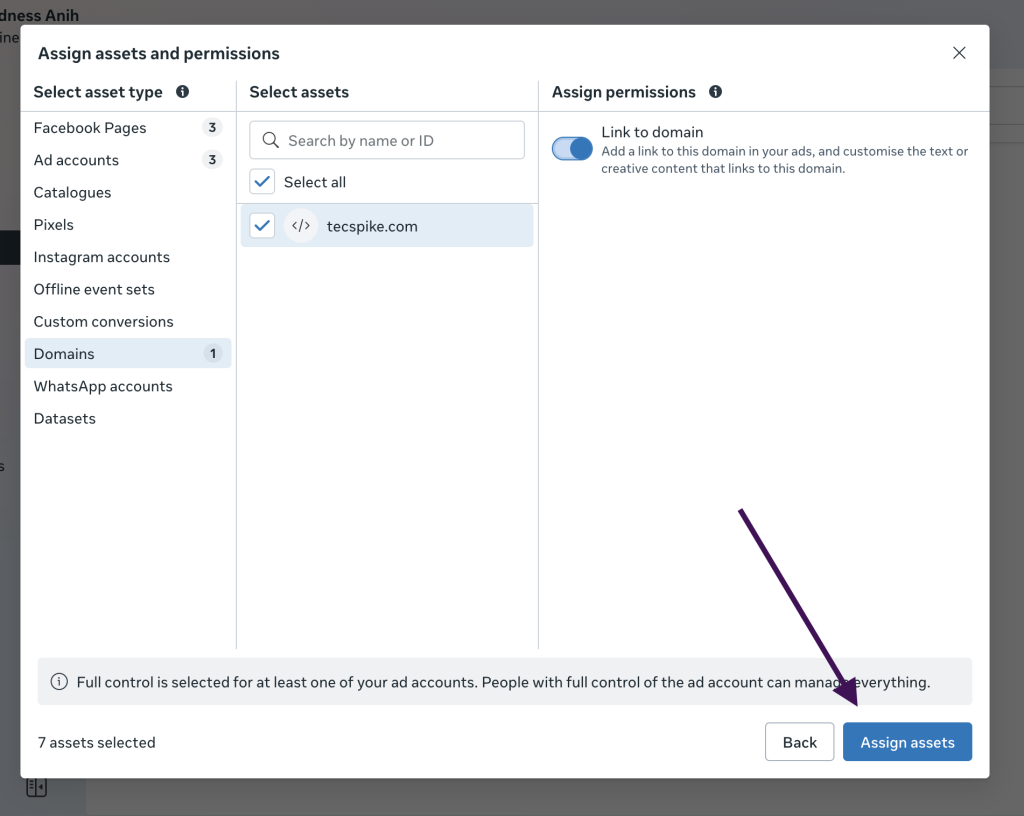
Assets to assign: Facebook Page, Ad Accounts, Instagram account, Domain (if any), Pixel (If any/needed)
Note: For each asset you assign, please be sure to select Full Control, this will allow us to properly manage and connect the Pixel and set up Conversion API on your website.
STEP 6:
Once you’ve assigned all the necessary assets, click the blue button labeled ‘Assign Assets’ to complete the process.
STEP 7:
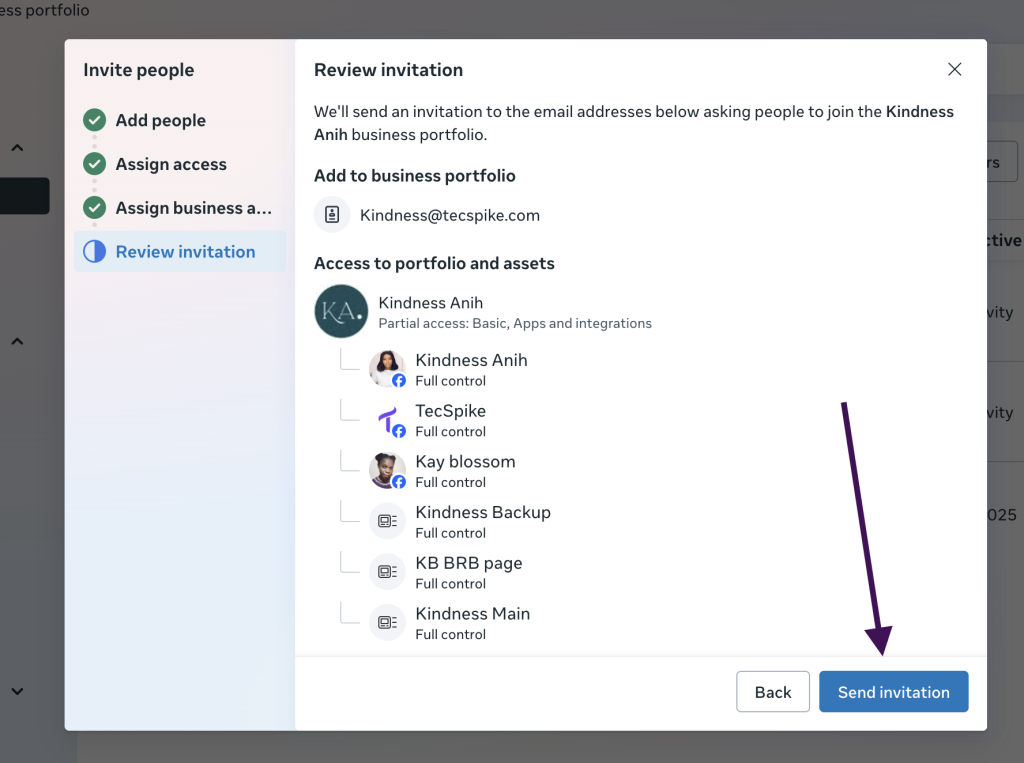
Review the setup and then click on the blue button that says, “Send Invitation”
STEP 8:
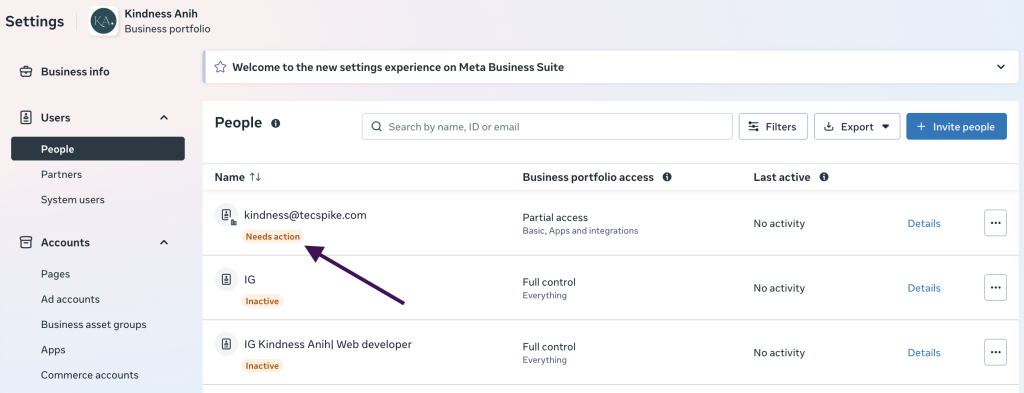
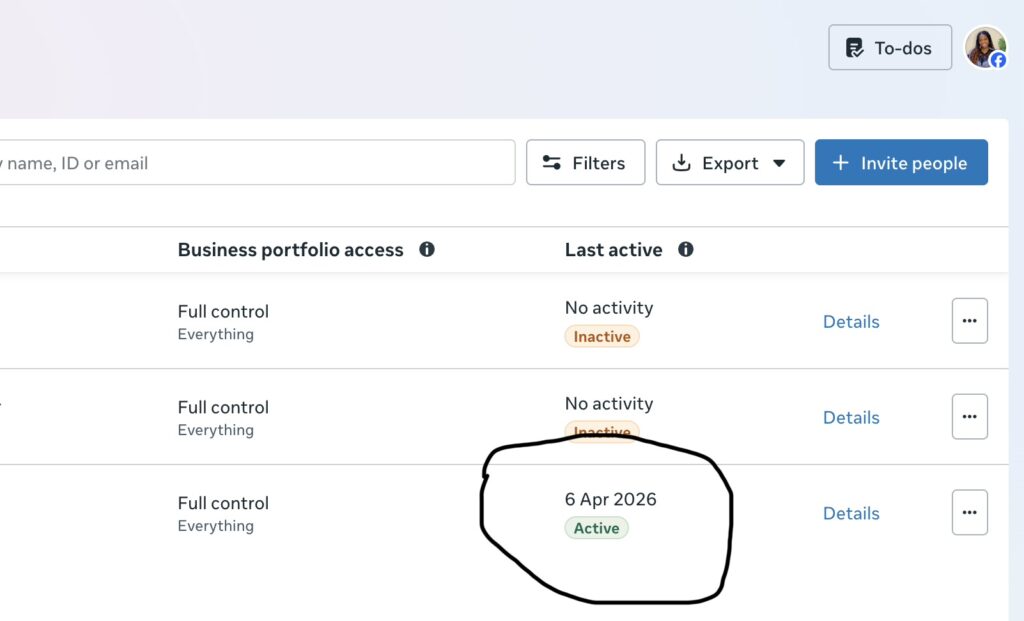
You should now see kindness@tecspike.com listed as a user, just like in the image below. If it shows “Needs Action,” it means Meta requires you to verify your account before the invite can be sent.
STEP 9:
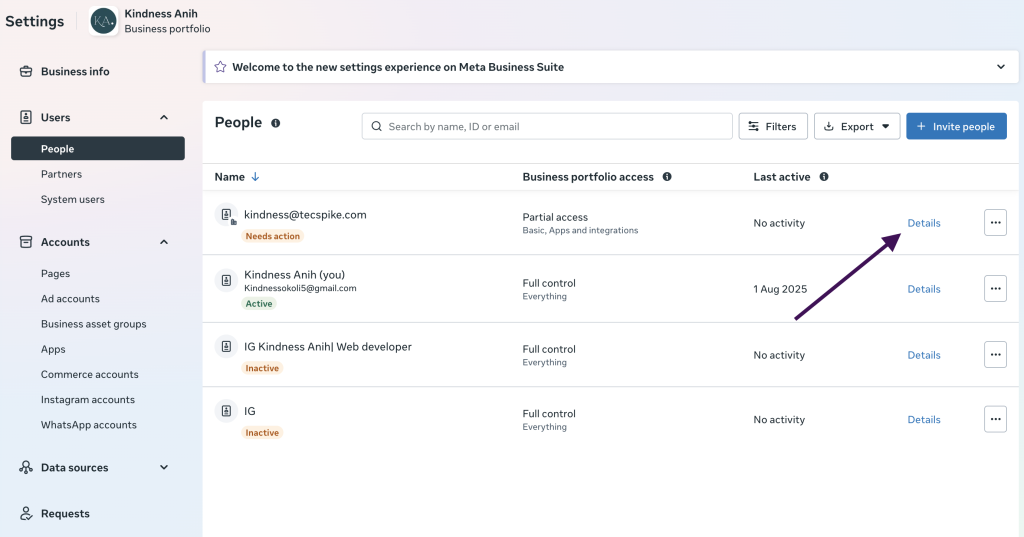
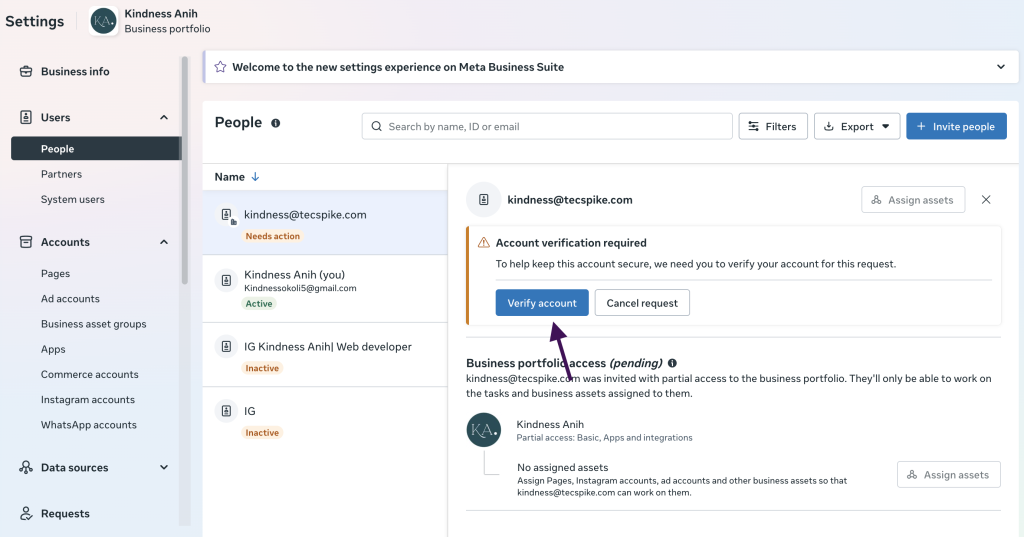
Click on “Details” then click on “verify account”,
STEP 10:
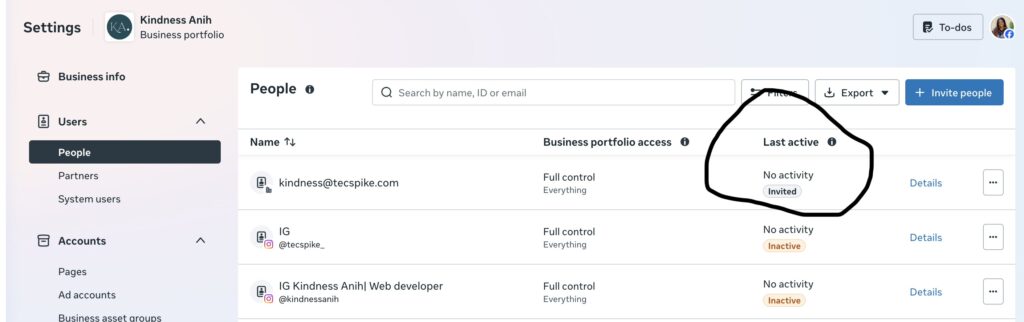
You’ll be asked to verify the phone number or email on your account by receiving a code. Once you get the code, enter it in the space provided. After verification, the user invite should look like the image below, it will show “Pending” or“Invited”. Once we accept the invite, the status will change to “Active.”